Running SQL Developer
At this point, you can use SQL Developer to interact with the database. If SQL Developer is open, right-click the Oracle connection you created earlier. In the case of Figure 2-9, the connection is called OracleDockerNew. This name is just text, so you can use whatever name you configured for your database.
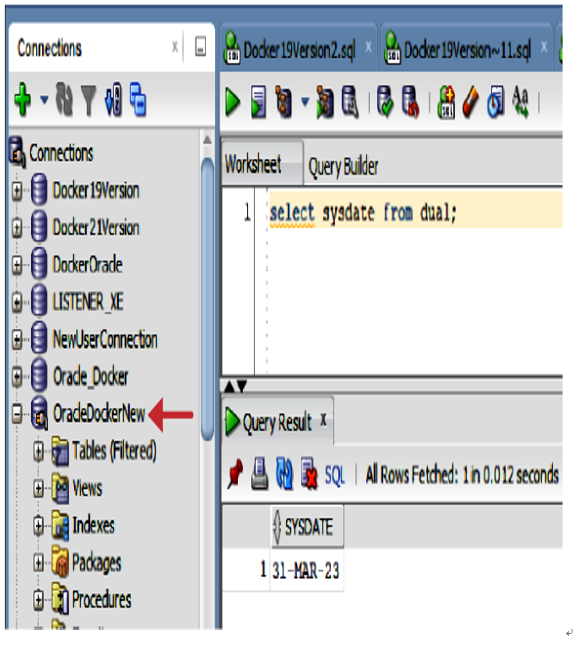
Figure 2-9. Using the Oracle Database connection
After right-clicking the OracleDockerNew connection, click Properties and you should see the dialog shown in Figure 2-10.
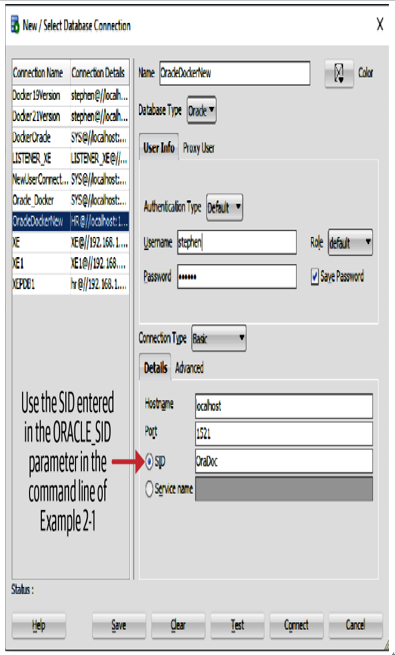
Figure 2-10. Opening the connection to the Oracle Database
Change the username to the value you selected earlier and supply your password, then click the Connect button. You should now have a connection to the database, as shown in Figure 2-11, where a sample SQL query has been executed.
Figure 2-11. The database connection is ready to use
To close down your setup, just do the reverse by following these steps:
Right-click the connection OracleDockerNew.
Click Disconnect.
Exit SQL Developer.
Type the console command docker stop 380195f59d0d.
In the docker stop command, supply the container ID for your own setup. After a little practice, the startup and shutdown steps will become second nature.
The next thing we need is a simple database and this requires a schema. Let’s now create an ultra-simple schema for use with the PL/SQL code examples.
A Simple Schema
A database schema is the structure of the data in the database management system. We will revisit the basic schema later, but for the moment the schema is composed of two rather imaginatively named tables: emp and temp.
To create the schema, paste the SQL in Example 2-7 into the Query Builder prompt shown in Figure 2-11.
Example 2-7. Schema creation SQL
CREATE
TABLE
emp
(
ename
VARCHAR2
(
10
),
empno
NUMBER
(
4
),
sal
NUMBER
(
7
,
2
)
);
CREATE
TABLE
temp
(
ename
VARCHAR2
(
10
),
empno
NUMBER
(
4
),
sal
NUMBER
(
7
,
2
)
);
INSERT
INTO
emp
(
ename
,
empno
,
sal
)
VALUES
(
‘John’
,
1000
,
40000
.
00
);
INSERT
INTO
emp
(
ename
,
empno
,
sal
)
VALUES
(
‘Mary’
,
1001
,
40000
.
00
);
commit
;
Notice at the end of Example 2-7, I insert two rows into the newly created emp table. To verify the contents of the emp table, run this SQL query:
select
*
from
emp
;
If your SQL Developer interface looks like Figure 2-12, then the tables are created and populated and you’re all set.
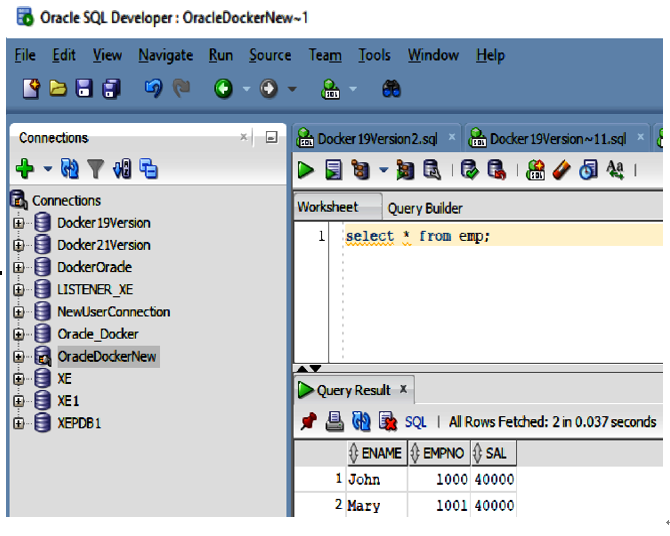
Figure 2-12. The data has been inserted
This also means that your installation of both Oracle Database and the sample schema is complete. It’s now time to run some PL/SQL.